How to generate your Google API keys
This guide will help you create your own Google API key for use with our product.
You’ll only need to do this once, and it should take about 10–15 minutes.
Step 1: Sign in to Google Cloud Console
- Go to https://console.cloud.google.com/
- Sign in with your Google account (e.g., Gmail). If you don’t have one, create a free account at https://accounts.google.com/signup.
Step 2: Create a new project
- Click the project selector in the top menu.
- Click “New Project”.
- Enter a project name (e.g., “My Business API Keys”).
- Click “Create” and ensure the project is selected.
Step 3: Set up billing (required by Google)
Even though Google requires billing, you get $200 USD of free usage each month — most users will not be charged.
- Go to “Billing” → “Link a billing account”.
- Click “Create billing account”.
- Follow prompts to enter your business and payment details.
- Link the billing account to your new project.
Step 4: Enable the Required APIs
- Go to “APIs & Services” → “Library”.
- Search for and enable these APIs:
- Places API (New): required for the new Proximity facet’s autocomplete function.
- Maps JavaScript API: required for the Map / Proximity facets to work.
- Geocoding API: required for the Proximity facet’s “Locate me” button.
Step 5: Create your “Server” API key
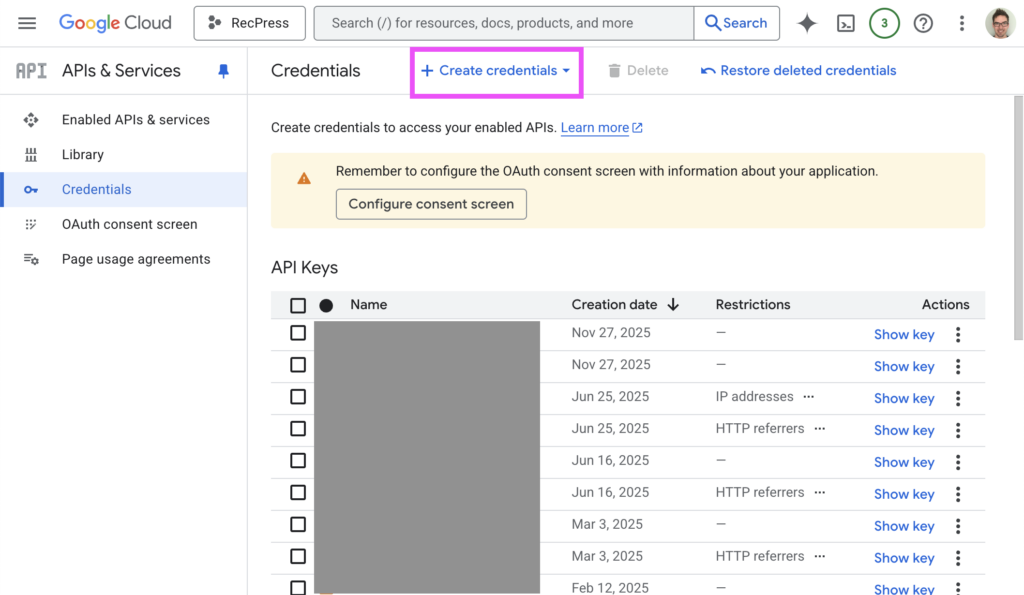
- Go to “APIs & Services” → “Credentials”.
- Click “+ Create Credentials” → “API key”.
- Copy the generated key (it looks like a long string of letters and numbers).
- Paste the key into a text document under “Server key” to send or save later (Step 7)
Step 6: Create your restricted “Client” API key
- Start again from “APIs & Services” → “Credentials”.
- Click “+ Create Credentials” → “API key”.
- Click “Edit API key”.

- Under “Application restrictions”, choose “Websites” or “IP addresses”.
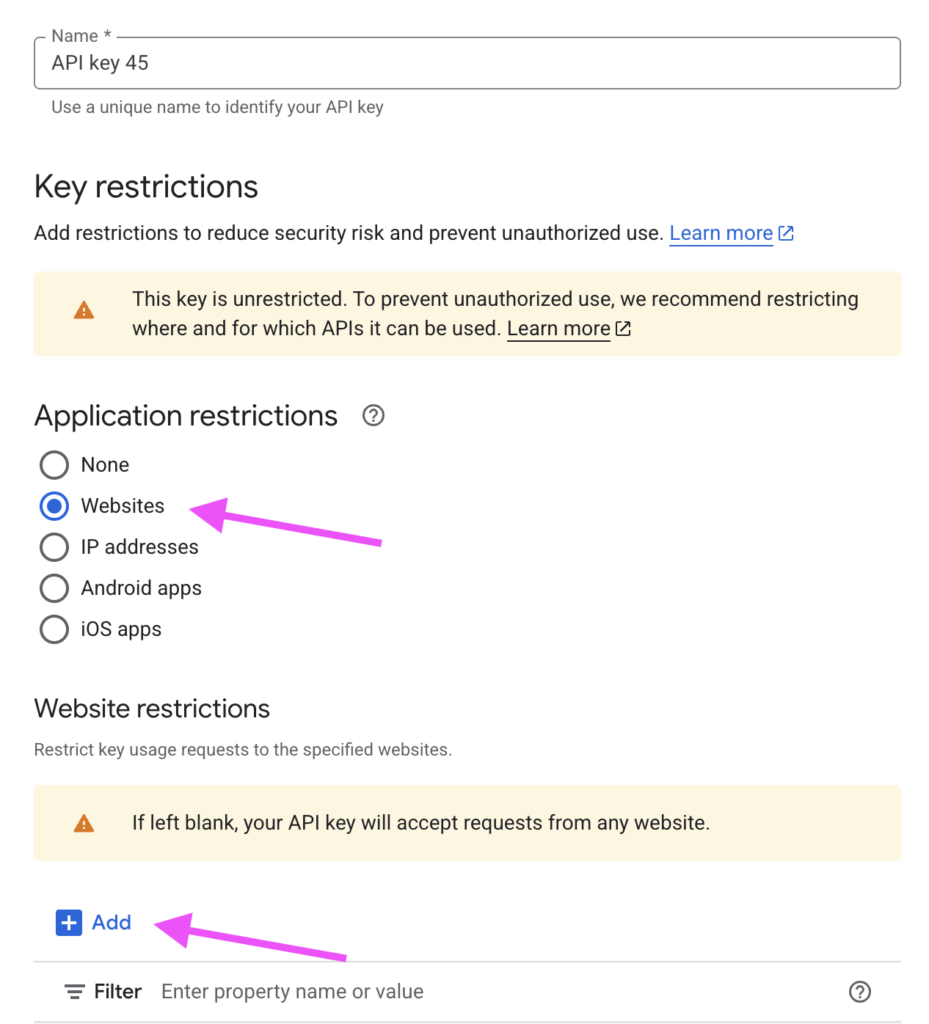
- Add your website domain, with no https or www, and with a trailing ‘/*’. E.g. yourwebsite.com/*

- Under “API restrictions”, choose “Restrict key” and select:
- Places API
- Maps JavaScript API (if applicable)
- Click “Save”.
- Copy the generated key.
- Paste the key into a text document under “Client key” to send or save later (Step 7)
Step 7: Add the keys to your website
Please feel free to email us these two keys, and we can complete this step for you.
Just be sure to let us know which is the ‘Client’ (restricted) key.
The client key, restricted by website URL should be entered on the FacetWP settings page in WordPress. This is found under Settings > FacetWP > Settings.
The server key should be entered on the WP Job Manager settings page. This can be found under Job Manager > Settings.
Summary
- Created a Google Cloud Project
- Linked a billing account ($200/month free)
- Enabled the required APIs
- Generated your API keys
- Added it to our product
If you need help, contact our support team — we’re happy to walk you through it.
Support: support@highrise.digital